Winter mud management for legs is one of those unglamorous jobs that quietly decides whether your horse stays comfortable or ends up sore, scabby, and cranky by February. When the gateways turn to soup and the track to the field never properly dries, your horse’s lower legs live in a cocktail of water, bacteria, and grit.
Handled well, winter mud is a nuisance. Handled badly, it can turn into mud fever, scratches, infections, swelling, and unnecessary time off. The tricky part? Knowing when to hose and when to brush so you’re not making the problem worse by over-washing or over-scrubbing.
This guide walks you through practical, realistic winter mud management for legs, with clear tips you can use the next time you bring a mud-caked horse in from the field.
Why winter mud on legs is more serious than “just dirt”
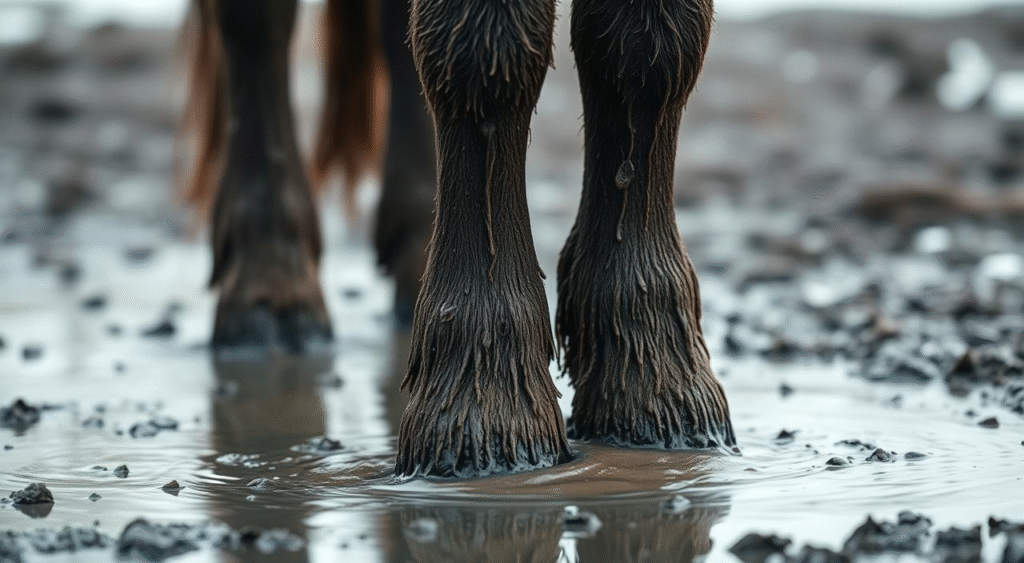
Winter mud isn’t just ugly. It’s the perfect breeding ground for bacteria and fungi, especially when it stays trapped against the skin.
What makes mud so risky for your horse’s legs
When mud coats the cannon bones, fetlocks, pasterns, and heels, three things happen:
- Skin stays wet and soft for too long – Constant moisture weakens the skin barrier.
- Grit and sand rub the softened skin – Micro-abrasions become tiny entry points for germs.
- Bacteria and fungi thrive – Especially around the heels and back of the pastern where air can’t circulate.
That’s how you end up with mud fever (pastern dermatitis), scratches, and in severe cases, cellulitis.
Common mud-related leg problems to watch for
Keep an eye on:
- Mud fever / scratches – Scabby, crusty, sore skin around the heels and pasterns
- Fungal dermatitis – Flaky, irritated patches that don’t clear up with basic cleaning
- Swelling (stocking up) – Legs that puff up, sometimes with heat and pain
- Cracked skin – Painful fissures, especially in horses with white legs or sensitive skin
Catching these early is half the battle. The other half is not creating them by over-washing or leaving mud on indefinitely.
Know your horse’s legs: where mud does the most damage
Understanding what you’re looking at helps you decide how aggressive you should be with cleaning.
Sensitive zones that collect mud
Pay extra attention to:
- Heels and back of the pastern – Deep creases where mud packs in and stays wet
- Fetlocks – Folds of skin where scabs and sores often start
- Behind the knee (front legs) and hock (hind legs) – Splash zones that take a beating
These places are where minor irritation can quietly turn into something that needs veterinary treatment if ignored.
How coat type changes your mud strategy
Not all legs handle mud the same way:
| Coat type | Mud tendency | What it means for management |
|---|---|---|
| Heavy feathering | Mud packs in feathers | Needs careful drying, more frequent checks under the hair |
| Short, fine hair | Mud sits on the skin | Easier to see problems early, but skin may be more sensitive |
| Clipped legs | Less trapped mud, but no protection | Must avoid over-washing and protect from cold and wet |
Feathers can protect skin when healthy and clean, but once mud and scabs hide underneath, they can also mask trouble. Short-haired legs show problems sooner, but they’re more exposed to cold and water.
Your winter mud management toolkit
The right tools make a huge difference in how quickly—and safely—you can deal with muddy legs.
Brushes and grooming tools that actually help
Have a dedicated “mud set” that lives by the stable door:
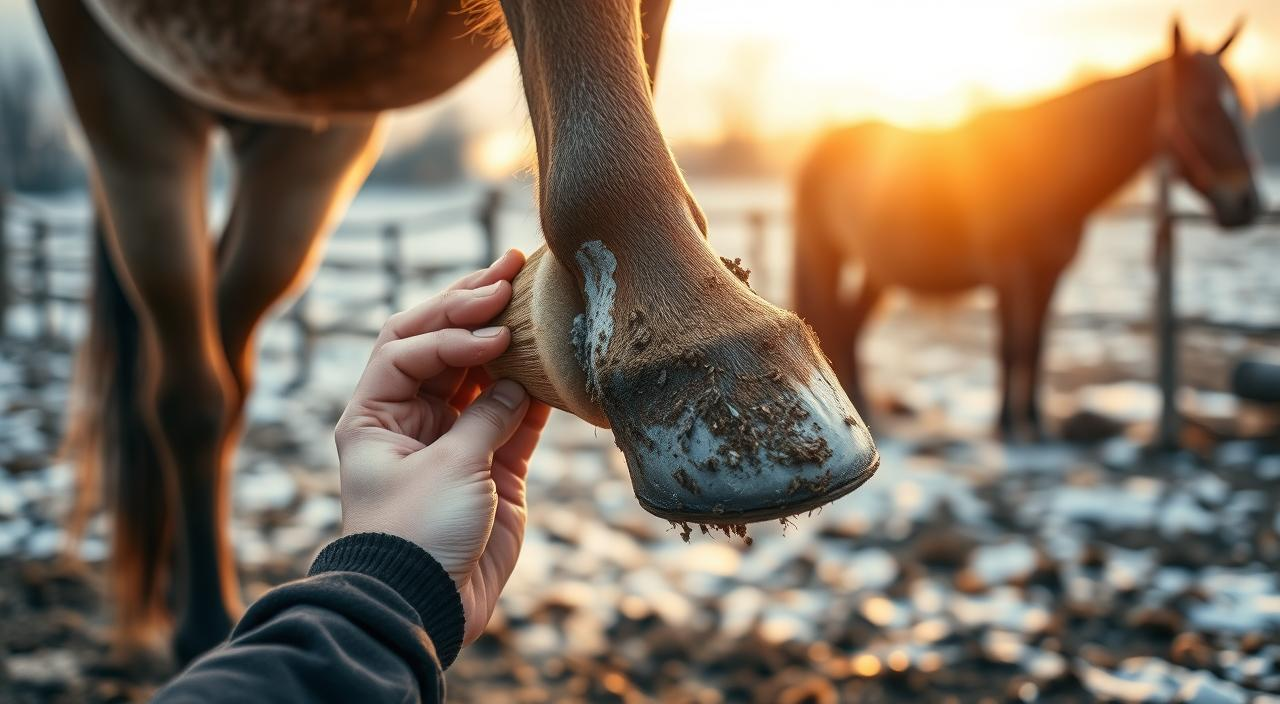
- Rubber curry mitt – Gentle way to loosen dried mud without scraping the skin
- Soft to medium body brush – For knocking off mud without over-scrubbing
- Soft face or leg brush – For sensitive heels and inside of fetlocks
- Hoof pick with brush – For cleaning mud and stones from around the coronet and hoof
Retire very stiff brushes or metal tools for mud removal on legs. They’re more likely to scrape already compromised skin.
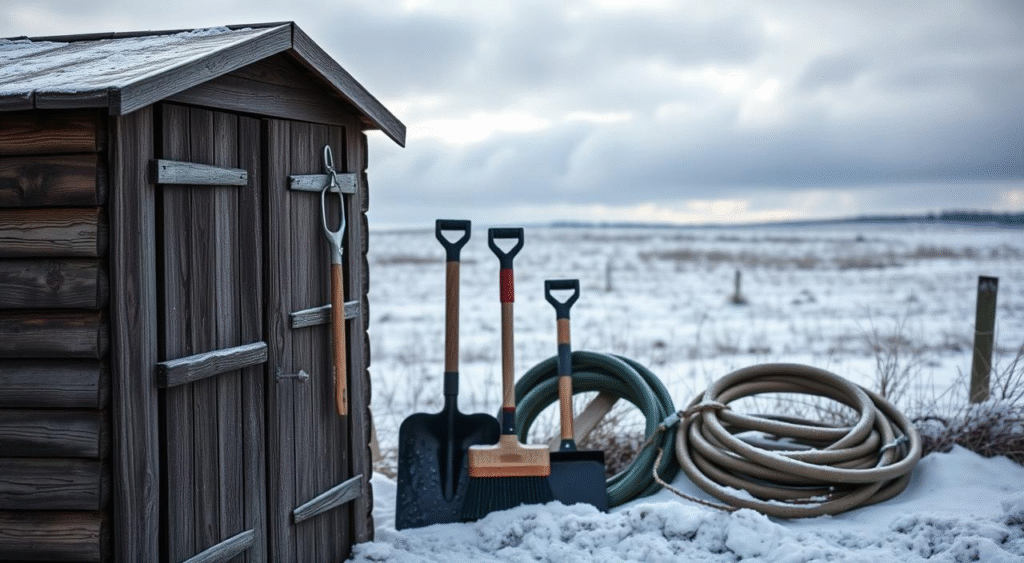
Hosing setup & water management
For hosing legs in winter, try to have:
- The hose you can drain and store out of the frost
- The spray nozzle with adjustable pressure so you can rinse gently
- Access to lukewarm water if you’re in a very cold climate
If all you have is ice-cold water and sub-zero air, hosing becomes a last resort, not a daily routine.
Drying and protection products
After cleaning, what you do next matters just as much:
- Absorbent towels or microfibre cloths – To dry legs thoroughly
- Barrier creams or ointments – Zinc-oxide or lanolin-based products to protect heels and pasterns
- Mild antiseptic wash – For occasional use if you spot cracked or compromised skin (not every day)
Think of it as: clean → dry → protect.
When to hose: how to decide if water is your friend or your enemy
Hosing is tempting—mud slides right off and everything looks instantly better. But in winter, water can cause as many problems as it solves if you use it at the wrong time.
Good conditions for hosing muddy legs
Hosing makes sense when:
- Temperatures are safely above freezing and unlikely to drop sharply soon after
- Mud is thick, wet, and stuck to the skin or hair
- The mud contains grit, sand, or manure that will irritate if left on
- You have time to dry the legs properly afterward
In other words, hosing is for heavy, clingy, skin-contact mud in weather that won’t chill your horse to the bone.
Mud types that usually need water
Some mud simply won’t brush off safely:
- Wet clay that adheres like paint
- Sticky, sludge-like mud caked into heels and pasterns
- Mud mixed with manure, urine, or bedding stuck to the fetlocks
In these cases, brushing alone means grinding abrasive sludge into softened skin. Water is the kinder choice—if you follow it with good drying.
Step-by-step: safe winter hosing
- Check the temperature – If it’s near freezing or dropping fast, think twice.
- Use gentle pressure – Aim for just enough to rinse, not blast.
- Work from top to bottom – Start above the muddy line and let cleaner water run down.
- Avoid soaking above the knee/hock if you can—focus on lower legs.
- Towel dry thoroughly – Especially around heels and pasterns.
- If your horse is clipped or thin-skinned, throw on a dry, appropriate rug afterward.
Post-hosing care essentials
After hosing:
- Make sure legs are dry before turnout in cold, wet conditions
- If your horse is prone to mud fever, apply a thin layer of barrier cream once the skin is dry
- Keep an eye on any pink skin or white socks—they’re often more sensitive
The goal is clean, comfortable legs, not legs that stay damp for hours.
When to brush: why sometimes “less water, more patience” is better

There are plenty of days when brushing, not hosing, is the best choice for winter mud management for legs.
Signs brushing is the better option
Brushing is usually your go-to when:
- Mud has dried into a crumbly layer
- It’s very cold or near freezing, making hosing risky
- Your horse’s skin is already sensitive or healing
- You’re dealing with light-to-moderate mud, not sticky plastered-on sludge
In these cases, adding water just softens the skin and recreates the “soggy, vulnerable” problem you’re trying to avoid.
How to brush winter mud off safely
- Let mud dry completely if it’s still damp—trying to brush wet mud just smears it.
- Start with a rubber curry mitt or your fingers to break up the surface.
- Use a soft or medium brush to flick off loosened mud in the direction of hair growth.
- Be extra gentle around heels, tendon area, and inside the fetlock; these spots get sore quickly.
- If a patch won’t budge without serious scrubbing, stop. That’s your cue that hosing or a warm, damp cloth might be kinder.
Avoiding brush-related skin irritation
Over-brushing is just as hard on legs as over-washing. To protect the skin:
- Always brush with the hair, not against it
- Use light, quick strokes rather than heavy pressure
- Clean your brushes regularly so you’re not grinding dried mud into the skin
- If your horse starts flinching or stamping, they’re telling you it hurts—listen
Sometimes the right answer is a combination: gently soften a patch with a warm cloth, then lightly brush once it loosens.
A simple decision guide: hose or brush?
Here’s an at-a-glance way to decide what to do on any given day:
| Condition | Weather | Best choice | Why |
|---|---|---|---|
| Thick, wet, sticky mud | Above freezing | Hose + dry | Brushing will rub grit into soft skin |
| Mud mixed with a lot of manure/urine | Above freezing | Hose + dry | Bacteria load is high |
| Light, dusty or flaking dried mud | Any (not raining) | Brush | Easy to remove without soaking skin |
| Moderate dried mud, no soreness | Mild, breezy | Brush (or damp cloth) | Avoid unnecessary water |
| Already sore or scabby skin | Mild temperatures | Very gentle rinse + pat dry, then vet-approved care | Skin needs minimal friction |
| Below freezing / icy conditions | Very cold | Brush if possible | Hosing risks chilling and frozen legs |
Use this as a guideline, then adjust based on your horse’s coat, health, and local climate.
Preventing mud build-up in the first place
The best winter mud management for legs starts outside the grooming area.
Paddock & turnout management
Small changes add up:
- Add gravel, mats, or hardcore in gateways, around water troughs, and high-traffic paths
- Rotate turnout areas when possible to avoid total churned-up mud zones
- Fix leaking troughs or poor drainage that create permanent bogs
You can’t get rid of mud completely, but you can drastically reduce the worst of it.
Using leg protection wisely
Leg boots and wraps can help, but only if used correctly:
- Choose breathable, purpose-made turnout boots, not neoprene that traps moisture all day
- Make sure boots fit snugly but not tight, and check for rubs
- Remove and clean boots daily—dirty, wet boots can cause exactly what you’re trying to prevent
Sometimes, no boots plus good barrier cream and smart turnout are safer than leaving boots on all day in deep mud.
Smart turnout scheduling
You may not be able to avoid mud, but you can limit exposure:
- Avoid turning out freshly hosed horses into freezing mud
- Use sacrifice paddocks in the worst weather and rest others
- Bring horses in for part of the day during extreme wet spells so skin can dry out
Think in terms of “hours of wet skin per day.” Reducing that number helps more than any single product.
Health red flags: when mud has gone too far
You can do everything right and still end up with issues sometimes. The trick is catching them early.
Signs mud is causing real trouble
Call your vet or at least have a serious look if you notice:
- Warm, swollen legs—especially if one leg is much bigger than the others
- Crusty scabs, bleeding cracks, or raw areas around heels/pasterns
- Your horse is reluctant to have legs handled, stamping, or pulling away
- Lameness, short steps, or obvious discomfort walking
Small patches of mud fever can often be managed early with a good plan. Once the leg blows up with infection, you’ll be facing vet bills, antibiotics, and stall rest.
Sample winter leg-care routine you can actually keep up with

Here’s a realistic framework you can tweak to your situation:
Daily (after turnout):
- Check legs for heat, swelling, or obvious scabs
- Decide hose vs brush using the mud and weather guide above
- Clean appropriately, then dry thoroughly
- If your horse is prone to mud fever, apply a thin barrier cream to heels and pasterns
2–3 times per week:
- Do a more careful inspection of all four legs, including inside fetlocks and around the coronary band
- Clean brushes and check your hosing setup
- Take note of any changes and adjust turnout or protection as needed
After severe weather or deep-mud days:
- Spend extra time inspecting heels and pasterns
- Consider shorter turnout the next day or using less muddy paddocks if possible
- If you see early mud fever signs, act quickly—clean gently, dry well, and consult your vet or trusted professional for appropriate topical care
Consistency beat perfection. A simple plan you follow most days is better than an elaborate system you abandon after a week.
Conclusion: winter leg care is preparation, not damage control
Winter mud management for legs isn’t about getting them spotless every single day. It’s about protecting the skin, keeping it as dry and intact as possible, and knowing when water will help—and when it will make things worse.
If you:
- Learn to read the mud and the weather
- Use a clear hose-or-brush decision process
- Protect legs with smart turnout, footing, and barrier products
- Watch closely for early signs of trouble
…you’ll ride out winter with healthier legs, fewer vet visits, and a horse who doesn’t flinch when you reach for a brush.
That’s the quiet work behind a sound, comfortable horse: not just the will to ride, but the will to prepare.
FAQs: Winter mud management for legs
1. Is it bad to hose my horse’s legs every day in winter?
It depends on the weather and how well you dry the legs. Daily hosing with cold water in low temperatures can soften skin, chill your horse, and actually increase the risk of mud fever. If the mud is light and crumbly, brushing is usually safer. Use hosing in winter mainly for thick, sticky mud that can’t be removed any other way, and always dry thoroughly afterward.
2. Should I clip my horse’s legs to help with mud control?
Clipping legs can make it easier to see and clean the skin, which helps with monitoring and treating mud fever. But it also removes natural protection and can make the skin more exposed to cold and wet. If you clip, be extra careful with barrier creams, drying, and turnout conditions. Never clip over broken or irritated skin without veterinary guidance.
3. Are turnout boots or leg wraps a good solution for winter mud?
They can be useful tools, but they’re not a magic fix. Turnout boots that are breathable and well-fitted can reduce mud contact in high-risk areas. However, if they get wet, clogged with mud, or rub, they can do more harm than good. Always remove, inspect, and clean boots daily.
4. What’s the best barrier cream to prevent mud fever?
Look for a thick, water-resistant cream designed for equine skin—often zinc-oxide based or lanolin-rich. Apply a thin layer to clean, dry skin on heels and pasterns before turnout. More isn’t better; caking on heavy layers can trap dirt and moisture. If you suspect infection, speak with your vet before applying anything over active lesions.
5. My horse already has scabs on the heels—should I pick them off?
Peeling off scabs on your own can cause bleeding and open the door to more infection. It’s much safer to work with your vet on a gentle cleaning and treatment plan. Often, softening products and medicated washes are used so scabs loosen naturally over time rather than being forcibly removed.
6. How can I tell if mud fever is starting?
Early signs include:
- Pink or reddened skin, especially on white legs
- Small crusts or scabs around the heels and back of pasterns
- Sensitivity when you touch or brush the area
- Hair lifting away in small clumps with scabs attached
If you catch it early, you can often manage it with careful cleaning, drying, and topical treatments under veterinary guidance.
7. Is it ever okay to just leave the mud on until spring?
Leaving heavy mud on for days or weeks at a time is asking for trouble. You don’t need to chase every spot of dirt, but you do need to prevent your horse from standing with caked, wet mud against the skin constantly. Regular inspection, targeted cleaning, and smart turnout will help you strike a balance between doing enough and not over-doing it.