
“The care of any equipment is a reflection of the care of its owner.” That line from horseman Monty Roberts rings especially true when we talk about storing bridles, bits, and reins. How you store your tack shows up later as soft, safe leather and clean metal… or cracked straps and rusty hardware.
Good storage isn’t just about looking tidy in the tack room. It protects your investment, keeps your horse comfortable, and reduces the risk of equipment failure when you’re in the saddle. In this guide, you’ll learn exactly how to store bridles, bits, and reins to avoid cracking, rust, and unnecessary replacements.
Why Proper Storage of Equestrian Gear Matters
Tack has a hard job: sweat, dirt, saliva, rain, temperature swings, and constant flexing. If you only clean it and then hang it “somewhere,” you’re asking the leather to dry out and the metal to rust before its time.
Done right, storage does three important jobs for you:
- keeps leather supple instead of brittle
- keeps metal smooth instead of pitted and rusty
- keeps small problems from turning into big, expensive ones
Here’s a rough look at what neglect can cost over time:
| Item | Typical Cost (USD) | Replace When Poorly Cared For | Replace When Well Cared For |
|——–|——————–|——————————-|—————————–|
| Bridle | $100–$300 | Every 2–3 years | 8–10+ years |
| Bits | $20–$100 | Every 1–2 years | 5–10+ years |
| Reins | $50–$150 | Every 2–3 years | 8–10+ years |
That’s real money you either save or waste based on how you care for your gear. There’s also the safety side: - A cracked cheekpiece can snap at the wrong moment.
- A rusty bit can pinch or cut the horse’s mouth.
- Dry, brittle reins can break when you need them most.
Proper storage is a small daily habit that quietly protects both your wallet and your horse.
Understanding Where Tack Is Most Vulnerable
Before you can store bridles, bits, and reins properly, it helps to know what they’re up against.
Leather Parts: Why Cracking Happens
Leather is skin. It needs:
- moisture (from conditioning)
- protection from harsh temperature swings
- protection from sweat, dust, and grime
Cracking usually comes from: - leather drying out in hot, dry air
- being stored dirty with sweat and dust baking in
- being folded, crushed, or hung incorrectly
Once leather cracks deeply, it’s usually a replacement job, not a repair job.
Metal Parts: How Rust Starts on Bits and Hardware
Most bits and hardware are metal alloys. Rust forms when:
- moisture sits on the surface (saliva, water, damp air)
- the metal isn’t dried properly
- tack is stored in damp, unventilated tack rooms
Even stainless steel can stain and pit if it lives in a damp, dirty environment. Copper and sweet iron will develop patina by design, but you still want that controlled, not flaky and rough.
Knowing these weak points shapes everything you do next: how you clean, condition, and store your tack.
Essential Pre-Storage Cleaning (The Non-Negotiable Step)
Never put gear away “for later” while it’s sweaty, muddy, or crusted with dried slobber. Pre-storage cleaning is your first line of defence against cracking and rust.
Cleaning Leather: Bridles and Leather Reins
- Wipe off surface grime
- Use a slightly damp cloth to remove sweat, hair, and arena dust.
- Use a leather cleaner or saddle soap
- Apply with a tack sponge or soft cloth.
- Work in small sections: crown, browband, cheekpieces, noseband, throatlatch.
- Rinse the sponge often
- Don’t grind dirty soap back into the leather.
- Wipe off any residue
- Leather should feel clean, not sticky or gummy.
Let the leather dry naturally at room temperature before you condition it or hang it.
- Leather should feel clean, not sticky or gummy.
Cleaning Bits Properly
Bits sit in saliva and food every ride, so they need special attention:
- Rinse immediately after use
- Warm water removes most saliva and feed particles.
- Scrub gently
- Use a soft brush or old toothbrush for joints and tiny crevices.
- Use a bit-safe cleaner if needed
- Avoid harsh chemicals; stick to products made for bits.
- Dry thoroughly
- Wipe with a towel and let air dry completely before storage.
| Bit Material | Cleaning Note |
|—————-|———————————————|
| Stainless Steel| Warm water + mild cleaner, dry fully |
| Copper | Mild soap, avoid aggressive abrasives |
| Sweet Iron | Warm water, allow patina but prevent rust |
- Wipe with a towel and let air dry completely before storage.
Cleaning Reins: Leather, Web, and Rubber
- Leather reins
- Clean just like bridle leather: wipe, clean, and later condition.
- Rubber reins
- Use warm water and mild soap; avoid strong solvents that can dry or crack rubber.
- Web or synthetic reins
- Wipe with a damp cloth and mild soap; dry thoroughly.
Cleaning reins before storage keeps them flexible and safe to hold.
- Wipe with a damp cloth and mild soap; dry thoroughly.
Conditioning Leather Before It Goes on the Hook
Clean leather needs moisture and protection before you leave it alone for any length of time.
Choosing the Right Leather Conditioner
Look for:
- products made specifically for tack
- conditioners that soak in, rather than sit sticky on the surface
Common types: - Creams/balms – good all-rounders for most bridles and reins
- Oils – best for very dry, older leather; use sparingly
- Conditioner with wax – adds a bit of water resistance
Avoid: - heavy oils on already soft leather (can make it spongy)
- furniture polish or random household “leather” products
How Often to Condition
- Regular use, normal climate: every 4–8 weeks
- Hot, dry climate or heavy use: every 2–4 weeks
- Off-season storage: clean and condition before you put it away long-term
Signs Your Leather Needs Immediate Attention
- It feels stiff or rough in your hands
- You see small surface cracks starting near holes or bends
- Colour looks dull and “thirsty”
If in doubt, lightly condition. It’s easier to maintain moisture than to rescue leather that’s already dried and cracked.
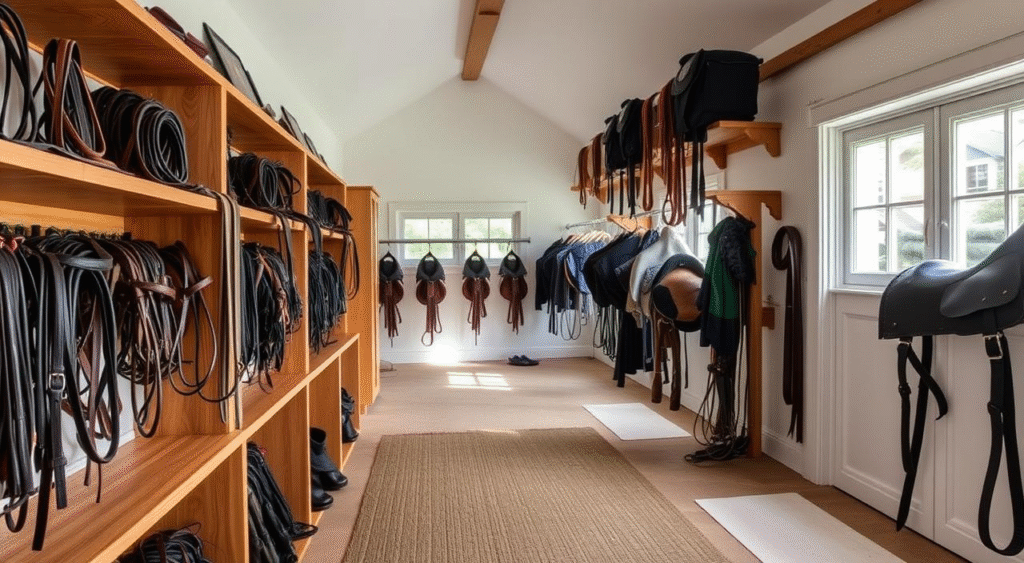
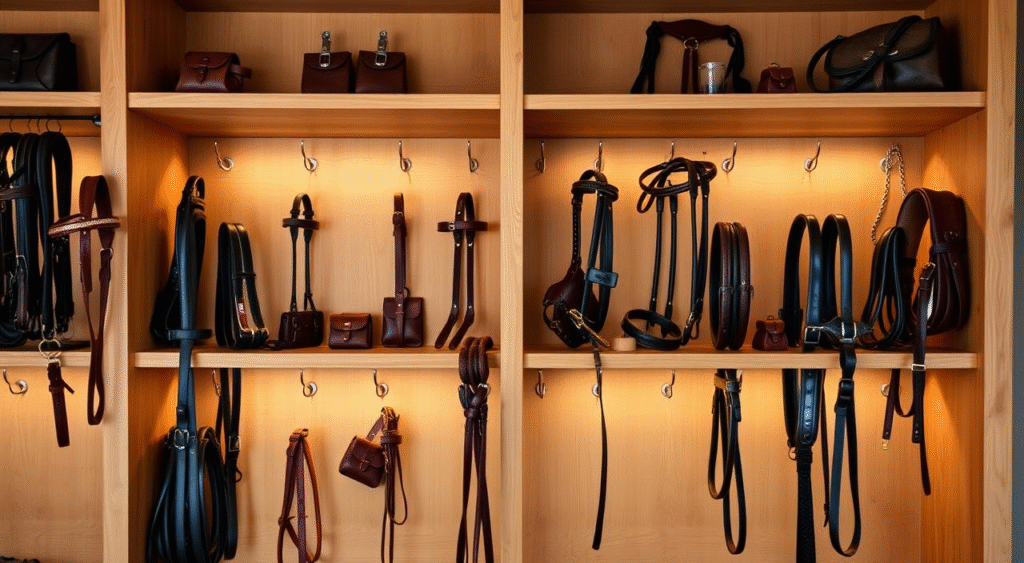
How to Store Bridles Correctly
Bridles are a mix of narrow straps, buckles, and weight-bearing areas. Poor storage will stretch some parts and crease others.
Best Hanging Methods for Bridles
- Use wide, rounded bridle hooks or racks
- Thin, sharp hooks dig into the crownpiece and cause creasing and wear.
- Hang by the crownpiece, not by a single cheekpiece or rein.
- Adjust the bridle so it hangs in a natural shape, not twisted or folded.
A good rule: if the bridle looks like it would sit neatly on a horse’s head, it’s probably hanging correctly.
Avoiding Tangled Bridle Piles
- Give each bridle its own hook when possible.
- Group by type (schooling, show, bitless, etc.) and label hooks.
- Never hang bridles in a “pile” over one hook; the lower ones get crushed, and mold can hide in the middle.
A tidy bridle wall isn’t just pretty — it prevents stress on the leather and makes your tack last longer.
How to Store Bits to Prevent Rust
Bits are simple, but they suffer quickly from damp air and neglect.
Keeping Bits Dry and Protected
- Always dry bits completely before storing.
- Avoid leaving them in a damp wash area or hanging over a bucket.
- Store in a dry, ventilated tack room, not in a closed, humid locker.
Storage Options for Loose Bits
- Bit racks or rails – hang each bit separately so air circulates.
- Bit drawers or boxes – line with a soft cloth; add silica gel packs in damp climates.
- Travel bags – choose ventilated designs and still make sure bits are dry before packing.
For routine storage, avoid sealed plastic bags around damp metal; that’s a rust incubator.
Extra Protection for Specialty Bits
- Copper – can be polished lightly if you prefer a brighter look, but a natural patina is normal. Keep clean and dry.
- Sweet iron – designed to darken; clean but don’t try to keep “shiny.” Watch for rough or flaky rust and replace if needed.
A quick check with your fingers after cleaning – is the surface smooth? If not, it’s time to reassess that bit.
How to Store Reins to Maintain Flexibility

Reins suffer when they’re sharply folded, twisted, or crammed in a corner.
Hanging Leather Reins
- Gently loop reins once or twice over a wide rein hook or bridle hook.
- Avoid tight, sharp folds that stress one spot over and over.
- Keep them away from damp concrete floors and dripping roofs.
For very soft leather, a light condition before longer storage helps them stay supple.
Storing Rubber or Web Reins
- Hang or loosely coil them; don’t yank them into tight loops.
- Keep rubber away from direct heat and strong sunlight, which can make it brittle.
- Make sure they are clean and fully dry; moisture trapped in rubber textures can smell and degrade material over time.
If reins feel sticky or “grabby,” consider a deeper clean and check for early wear.
Environmental Factors That Affect Stored Tack
You can clean and condition perfectly and still lose the battle if your tack lives in the wrong environment.
Humidity: The Big Leather and Metal Enemy
- High humidity = mold, mildew, and rust
- Very low humidity = dried-out, cracking leather
Aim for a middle range: roughly 40–60% humidity if you can. Practical steps: - Use a dehumidifier in damp climates or basement tack rooms.
- Use moisture-absorbing packs in closed tack lockers.
- Ensure some airflow; stagnant, warm, damp air grows mold fast.
Temperature and Sunlight
- Avoid storing tack where temperatures swing wildly (uninsulated sheds, car trunks).
- Keep leather out of direct sunlight to prevent fading and drying.
- Do not hang bridles or reins right over radiators or heaters.
Ideal storage: a cool, dry, shaded tack room with decent air circulation.
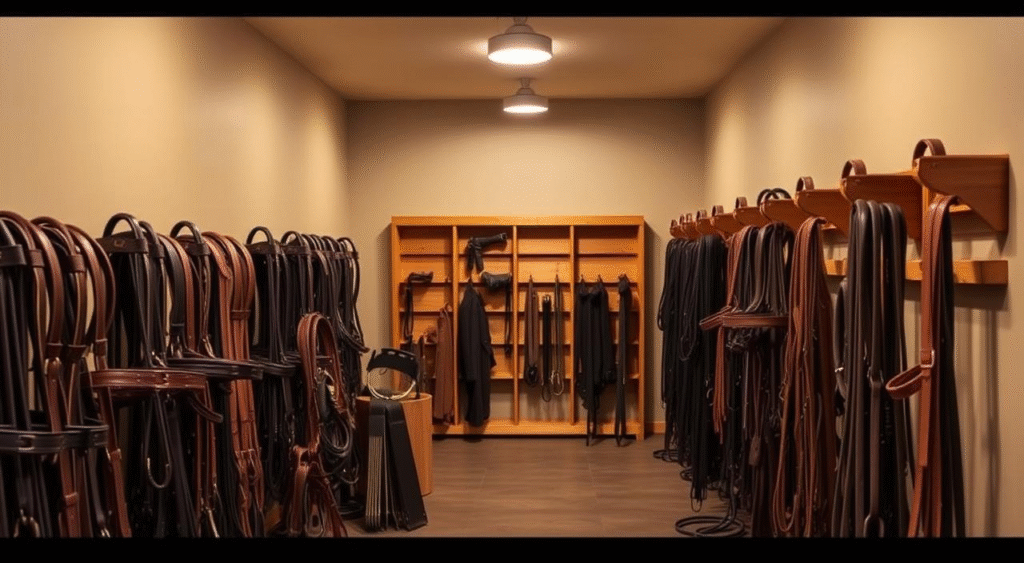
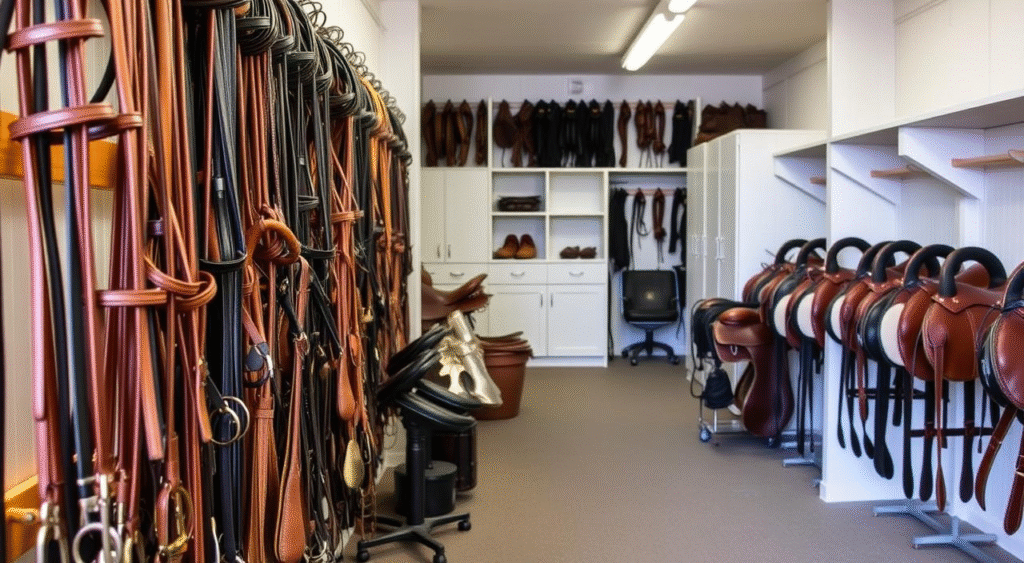
Tack Room and Stable Storage Solutions
You don’t need a fancy barn to store bridles, bits, and reins properly — just thoughtful set-up.
Simple Tack Room Organization
- Install bridle racks with enough hooks for each bridle and set of reins.
- Add bit rails or a pegboard with labelled hooks for loose bits.
- Use small baskets or drawers for spare hardware and cleaning cloths.
An organized tack room reduces the urge to “just throw it somewhere,” which is exactly how things get damaged.
Budget-Friendly DIY Ideas
- Use smooth wooden rails as rein and bridle holders.
- Repurpose sturdy coat hooks for bridles (as long as they’re not too narrow).
- Hang a piece of board with screwed-in hooks for bits and labelled tags underneath.
Even on a shoestring, you can create a storage system that keeps your gear off the floor and out of damp corners.
Common Storage Mistakes That Shorten Tack Life
A few habits do more damage than people realize:
- Hanging bridles by the bit or reins – stresses the wrong areas and stretches leather.
- Leaving bits wet in a bucket or wash stall – invites rust.
- Piling tack in a trunk damp and dirty – guarantees mold and stiff leather.
- Storing tack near chemicals – fertilizers, strong cleaners, or fuel can dry or stain leather.
Small course-corrections in how you hang and place gear can add many years to its working life.
Seasonal Storage: When You Ride Less (or Stop)
If your riding slows down in winter or off-season, your storage routine needs one extra step.
Off-Season Storage Checklist
Before you put tack away for a long break:
- Clean thoroughly (bridles, bits, reins).
- Condition leather thoroughly but not excessively.
- Check for existing cracks, loose stitching, or rust.
- Store in a cool, dry place in breathable covers (no plastic wrap).
Bringing Tack Back into Regular Use
When you’re ready to ride again:
- Inspect leather for any new dryness or fine cracks.
- Check all buckles, stitching, and rein attachments.
- Wipe bits again before use, even if they were clean going in.
A quick “welcome back” check prevents you from riding in something that quietly degraded over the break.
Long-Term Benefits of Storing Bridles, Bits, and Reins Properly
Storing bridles, bits, and reins isn’t about being fussy — it’s about being smart. With a few simple habits, you:
- avoid cracked leather that fails under pressure
- prevent rust that hurts your horse’s mouth
- stretch your tack budget much farther
- keep your tack room a safer, more pleasant place to work in
Well-stored tack feels better in your hands, is kinder to your horse, and reflects the pride you take in your horsemanship. Every time you wipe, hang, and store something properly, you’re quietly adding months — even years — to its life.
FAQs About Storing Bridles, Bits, and Reins
How often should I clean tack before putting it away?
At a minimum, wipe down and clean leather parts after every few rides, and always after very sweaty or muddy sessions. Bits should be rinsed after every ride. Before any long storage (weeks or months), always do a full clean and condition.
Can I store my bridle in a sealed plastic bag to keep dust off?
It’s better not to. Plastic traps moisture and encourages mold and mildew. Use a breathable bridle bag or fabric cover instead, and make sure the leather is completely dry before covering.
Is it okay to oil leather every time I store it?
No. Over-oiling can weaken leather and make it spongy. Clean regularly, and condition as needed based on feel and appearance — usually every 4–8 weeks for regularly used tack, more often in very dry climates.
How can I tell if a bit is too rusty to use?
Surface discoloration or light cosmetic patina on sweet iron is normal. But if the metal feels rough, pitted, flaky, or sharp, it’s time to retire that bit. Your horse’s mouth should only meet smooth metal.
My tack room is damp. What can I do without rebuilding the whole thing?
Small changes help:
- use moisture absorbers or a dehumidifier
- keep tack off the floor and away from exterior walls
- increase airflow with a small fan
- clean and dry tack thoroughly before hanging
These low-effort steps make a real difference in preventing mold and rust.
Treat storing bridles, bits, and reins as part of your ride, not an afterthought. The more consistent you are, the more your tack will quietly repay you in comfort, safety, and years of good service.